

Doggy Don't Care: Complete badge guide for all levels

Doggy Don’t Care is an adorable, chaotic adventure puzzle game that centers around a pug that seems to live for the most unhinged type of mischief, and all four of the levels in the game feature Mischievous Badges that need to be earned before you can move on to the next location.
In total, there are 84 badges across the four levels to collect in order to complete the game, and each badge is associated with an environmental puzzle you need to solve using only the vaguest of hints from the bird in each level. Some of the puzzles are more difficult to complete than others, while some can only be unlocked via a chain including other badges.
If you’re stuck trying to figure out how to get a particular badge in Doggy Don’t Care, don’t worry; I’ve gone through this multiple times with my daughter, so I’ve got you covered.
Contents
Complete Doggy Don’t Care badge guide
Each level (House, Farm, Office, and Museum) has 21 badges to collect and a varying number of pup treats to find. You need to find all the treats and complete every badge before you can move on to the next level via a surreal dream experience.
House badges

As an introduction to the game and its various mechanics, some of the badges here are easy to get, but that doesn’t mean some won’t have you stumped. Here’s how to get all 21 badges in the house in Doggy Don’t Care:
Badge | How to get |
 | Head into the bedroom with two beds and pick up the unicorn toy on the bed. Squeak it next to Rocko to wake him up. |
 | After learning double jump, head over to the piano and walk all over the keys. |
 | Double jump on or in front of the record player next to the dining table. |
 | Grab the TV remote from the bedside table in the main bedroom (double jump to open the door) and use it to turn on the TV in the living room. |
 | Double jump on or in front of the oven in the kitchen to get the chicken leg. |
 | Double jump in front of the washing machine, grab a sock, and put it in the oven. Double jump in front of the oven to close it, starting a fire. |
 | In the garage, jump up onto the shelf behind the car, then double jump on the overturned oil can to make a puddle on the floor. Walk through the puddle and jump onto the car, leaving a trail of paw prints. |
 | Pee. Literally anywhere. |
 | Grab the bowling ball from the bottom shelf in the corner of the garage and throw it at the deer statue near the piano. |
 | Use the same bowling ball to smash the glass door into the garden. You’ll need to throw it a few times to break the glass. |
 | Pick up the tooth brush from the vanity and put it in the toilet. |
 | Throw the bowling ball at the TV. Works either before or after turning the TV on. |
 | Jump onto the Roomba and pee. |
 | Using the key on the shelf in the garage, unlock the chest in the bedroom with two beds. Grab the basketball and head into the garden to score a hoop. |
 | There are five gnomes to find and throw in the garden to get this badge:
|
 | Dig a hole in the garden at any molehill. |
 | Tug on the pull cord of the lawnmower and send it through the flowers. |
 | Double jump on the doghouse to smash it. |
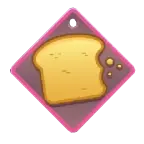 | Take the bread from the toaster in the kitchen and throw it out for the birds in the garden. |
 | Grab the soap from inside the bathtub off the main bedroom, then put it in the washing machine. Double jump to turn it on. |
 | Jump on the button in the garage and then jump through all the hoops. There are 16 hoops and 45 seconds to get them all. |
Farm badges

The farm is substantially larger than the house, and there are a lot more moving parts to contend with. This is also where some of those chains come in, with some badges locked behind others. Here’s how to get the 21 Farm badges in Doggy Don’t Care:
Badge | How to get |
 | Double jump on five frogs. They’re everywhere around the farm. |
 | Double jump on five moles as they pop up out of their holes. There are only five to find:
|
 | Jump into the pig pen and get covered in mud, then jump out again avoiding the water trough. Double jump next to the clothesline to cover the laundry in mud. |
 | Double jump on a sheep next to the cheese-o-matic barn to get onto the roof and grab the red flag. Use it to lure the bull out of its enclosure and guide it to the greenhouse to smash it. |
 | Double jump next to the tree with the wasp nest in it, then pick up the nest and throw it at the goose outside the cheese-o-matic barn. |
 | Pick up the spray bottle from inside the smashed greenhouse and use it to spray the sunflowers next to the pig pen. |
 | Just pull on the pig’s tail. |
 | Use the red flag to guide the bull over and break open the gate to the sheep field, then bark to guide a sheep towards the three silos. Double jump on the sheep to get to the top, then double jump on each of the buttons at the top of the silos. |
 | Double jump next to the tree where the apples are and give one to the goose in the cow field to get the lever. |
 | After putting the lever on the milking machine, use the bark-guiding technique to guide a cow into the machine. |
 | This is a two-step badge. Take the milk that the cow gives in the machine to the cheese-o-matic machine - you cannot jump while holding the bucket of milk, or you will spill it. Go the long way around! Put the milk in the machine, then grab the cheese that pops out and take it over to the tractor behind the wheat field. Once it’s where the wheel should go, hop into the driver's seat and start the tractor to make it crash. |
 | Get the fuse from on top of the boxes in the barn and put it in the wood chipper by the front gate. Then, find the following tools and throw them into the machine:
|
 | Double jump on any five hay bales around the farm. |
 | Double jump on the wooden box near the dog bed to get the scythe, then use it to cut down some wheat. |
 | Use the red flag to guide the bull into breaking three gates:
|
 | Pee on any part of the electric fence that runs around the outside of the farm. |
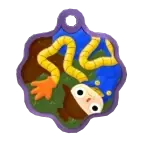 | Get muddy in the pig pen, then head over to the pumpkin patch. Double jump on the solar panels to deflate the scarecrows. You’ll need to do both solar panels. |
 | Grab a boot from inside the cheese-o-matic barn and take it to the well near the entrance. Throw it inside. You only need to do one boot. |
 | Make it to the center of the maze. I’m not giving directions, but you’ll get there eventually if you wander around a bit, collecting all the treats inside. |
 | Use the key from the middle of the maze to unlock the chicken coop, then double jump on five chickens to remove their feathers. |
 | Jump on the button near the entrance and then jump through all the rings along the agility course. There are 14 rings to get through in 40 seconds. |
Office badges

Things start to get a little more complicated in the Office level, but there’s a lot of fun to be had completely trashing the Pawjama headquarters, especially if you’ve ever worked in an office and dreamed of throwing things around. Here’s how to get all 21 badges on offer in this Doggy Don’t Care location:
Badge | How to get |
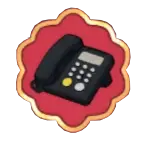 | Answer the phone on the reception desk when it rings. |
 | Double jump on the five wire trash cans around the office:
|
 | Bark at the machine in the middle of the table in the conference room. |
 | Pop the five party poppers littered around the office:
|
 | Double jump next to the drawers of the rightmost desk in the main office room to get the printer paper, then take it to the photocopier. Jump onto the photocopier and interact with it to take a scan of your butt. |
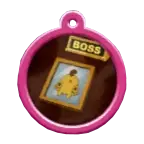 | Take the resulting image to the boss's desk in the back room. |
 | In the main office room, find the loose carpet fiber near the plant in the corner. Tug on it to get the access code for the safe. Interact with the safe in the boss’s room to open it. |
 | Take a wad of cash from inside the safe and bring it over to the boss’s desk to shred it. |
 | Take the certificate off the wall next to the door in the boss’s room and take it to the desk to shred it. |
 | Grab the fire extinguisher off the wall in the main office room and spray it until it’s empty. |
 | Double jump next to a water dispenser near the elevator to remove the lid, then throw any of the golden bobbleheads into it. |
 | Pick up a pool ball from the table in the break room and throw it at the fire alarm next to the kitchenette. Pull the fire alarm. |
 | Throw a pool ball at the fish tank in the boss’s office. You’ll need to throw it three times to break the glass. |
 | Pick up the spilled fish and throw it into the other water dispenser near the elevator. |
 | Grab a laptop from the main office room and put it in the microwave in the break room. Double jump on or near the microwave to open and close it. |
 | Repeatedly interact with the cake in the main office room to scoff the lot. |
 | Pick up any pen pot and throw it to spill the contents. Pick up the chunky red marker, then jump onto the whiteboard in the main office room and draw a picture. |
 | In the main office room, tug on the red rope holding up the birthday bunting to bring it down. |
 | Turn on the fan in the conference room using the switch under the screen, then grab some balloons and jump onto the table to pop them. |
 | Pick up any soda can and shake it until it starts foaming, then throw it. |
 | Jump on the button in the room with the photocopier, then jump through all the rings. There are 30 rings to hit in 75 seconds. |
Museum badges

This is the final level in Doggy Don’t Care, and also where things get most complicated. But no challenge is impossible, and this location is a whole lot of fun to explore. Here’s how to get all 21 badges in the Museum level:
Badge | How to get |
 | Take one of the paintbrushes from the ladder in the balloon animal room and throw it at each of the cat portraits in the next room. |
 | In the Egyptian room, jump onto each of the four pillar candles in the corners of the grid and pee on them to put them out. |
 | Interact with the wires to pull down the five security cameras:
|
 | Grab the electric charge powering the bulb in the lab room, then put it under the red bulb in the Mars rover room. The rover will wake up and dig up a camera. Take the camera and head to the balloon animal room, then take a photo. |
 | Pee in the fountain. |
 | In the lab room, gain static charge by jumping onto the plasma ball. Head back to the balloon animal room and touch the balloon animal to pop it. |
 | Double jump on the crystal button in the main lobby to bring the bars down, then run through and grab the crystal from the podium. This only works after you’ve pulled the security camera down in that room. Take the crystal to the dinosaur room and use the dinosaur foot exhibit to crush it. |
 | Crush something using the dinosaur foot exhibit. |
 | There are three sarcophagi (two in the Egyptian room and one in the main lobby), each with specific symbols on them. Double jump on those symbols on the grid in the Egyptian room, top to bottom for each sarcophagus, to open them:
|
 | Interact with the mummies that come out of the sarcophagi to unravel their wrappings. |
 | Dig up the three objects in the pit in the middle of the dinosaur room. Use the dino foot to crush them. |
 | Use the unearthed axe to smash the four sculptures in the fountain room. |
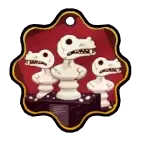 | Replace the heads of those statues with four skulls. Two are found in the pit, and the other two can be removed from the small dinosaurs in the corner of the dinosaur room. |
 | Bark into the microphone at the base of the dinosaur head exhibit to make it roar. |
 | Using the axe you dug up, smash the four donation stands around the museum to get the coins out. |
 | Use the same axe to break the two monitors on the reception desk in the lobby. |
 | Get the key from the head of the brontosaurus skeleton and use it to unlock the locker in the lobby. Grab the vacuum, and use it to suck corks out of five mouse holes:
|
 | Charge yourself up by jumping onto the plasma ball in the lab room, then shock three of the mice that came out of the mouse holes. One charge is enough. |
 | In the lobby, pull on the two red ropes that keep the whale skeleton suspended on the ceiling. |
 | In the lab room, smash the three vials of glowing liquid, then walk through them and leave a trail of paw prints. |
 | Double jump on the button in the lab room, then pass through every ring that appears. There are 25 rings and 90 seconds. |
Enjoyed this article? 💜 The Nerdy Type is independently run and free to read. If you'd like to support what I do, you can buy me a coffee on Ko-Fi. There's absolutely no pressure; reading and sharing my work already helps enormously. |


Comments